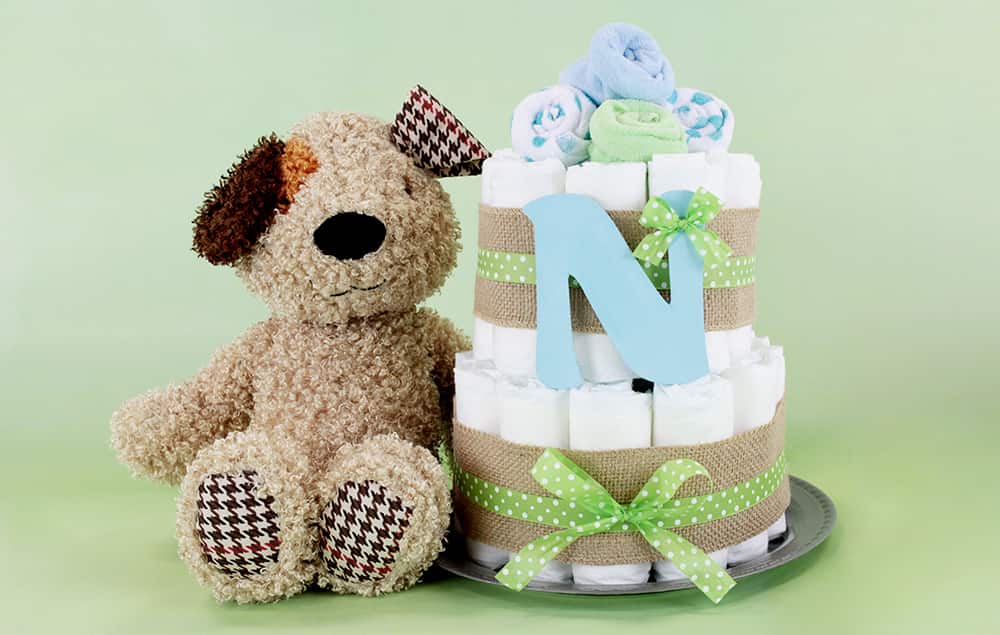
Looking for a present to give for baby showers is rather difficult for those people who want to share something extraordinary which will be unforgettable. A good gift to give during these events is a diaper cake. This gift is a fun and festive way to make simple diapers and toys become a little more enchanting. It is a gift new parents are sure to love. Diaper cakes are practical and unpredictable. It can be assured that the future mom will appreciate it because you gave a gift that she’ll cherish for a long time. This is a gift you can make yourself. Don’t be afraid to hire a pro if you aren’t the crafty type.
Read on below to learn how to make diaper cakes:
Time to Shop
Before you can start making your own diaper cake, you will need to run to the store and grab a few materials for your masterpiece. Pick some diapers with a bigger size because a lot of babies don’t fit the size for newborns. Go with larger sizes, starting around 3 months. It’s ok if the diapers are too big, they will still be useful at some point. Diapers that are too small won’t be useful at all.
To make the cake more colorful, pick diapers and blankets or baby clothes with different hues and patterns. Pick a stuffed animal or a nice toy to make as a topper.
Here is a complete list of the things that you may need to make the diaper cake:
- Diapers
- Blankets and napkins
- A box of regular rubber bands
- A box of XL rubber bands
- A large and thick cardboard
- Pencil
- Wide ribbons
- Scissors
- Empty paper towel roll
- Double-sided tape
- Small toys to use for decoration
Start Rolling
Begin by rolling every diaper into a tight cylinder. Start rolling from the crotch until the waistband. Secure the rolled diapers by putting one regular rubber band into the center. It will get a bit tiresome but think in advance how beautiful the final piece when all the work is finished. Start rolling the blankets or washcloths and tie them in the same manner you did with the diapers. The rolled blanket or washcloth will make the top and final tier of the diaper cake.
Layer the Cake
For the first layer of the cake, begin by making the paper tower roll stand on your worktable. Then you must surround it with the rolled diapers so that it will look like a tower surrounded by pillars. Place another set of diapers surrounding the first one and then the final circle. Use extra-large rubber bands to secure the diapers and form an entire tier. Place the finished layer on the cardboard. Carefully draw a circle, tracing the first layer. Cut the cardboard out in the drawn circle and then placed the finished layer on the top of it. Placing the cardboard is important as it makes a strong foundation and makes it easier to carry.
For the middle tier, create a smaller layer and place it on the first layer. Secure them again with another rubber band. For the top tier, ready the rolled blanket or washcloths on the middle tier. Put one rolled blanket or wash cloth at the center then surround it with other rolled napkins. Secure them by using another XL rubber band. Slide one pencil through the top tier down to the middle tier to safeguard the cake layers to each other. The total number of diapers needed for the diaper cake will depend on how large the cake is and how tightly you have rolled the diapers. If your cake is not looking as good as you expect it to be, just relax, it will look a lot nicer once the rubber bands are covered with ribbons. You can add little accents at the end.
Final Adjustments
Surround the layers with ribbon so that the rubber bands that hold the tiers in place are concealed. Use double-sided tape to secure the ribbon and do it with the rest of the tiers. Place the toys and other baby supplies on every layer.
Usually, it is better for the cake to have a theme such as jungle theme, under water theme, farm animal, or floral theme and many others. Finally, place a stuffed animal or a nice toy on top of the cake to make it look more perfect. It just might turn as the baby’s new favorite snuggle buddy.
And that’s it! You have one cute diaper cake! We hope this guide helped you learn how to make a diaper cake all on your own. It is much easier that it looks and don’t forget that you can add themes to your next diaper cake so you can leave it with your own personal touch.
