
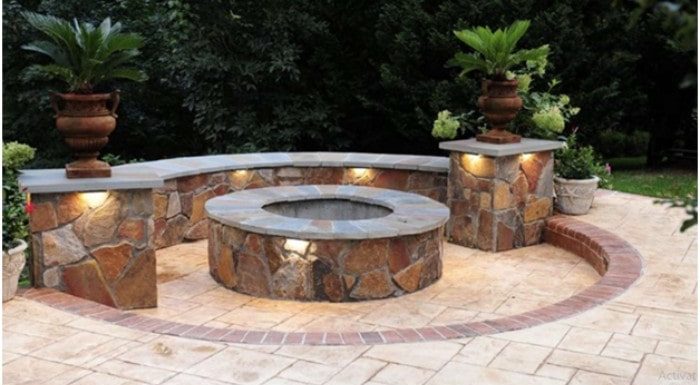
Thinking of building an outdoor stone fireplace?
Are you tired of those beautiful afternoons spent sitting around your house with a few friends watching the sunset? It’s getting cold – some of your friends decide it’s time to go home, while others retreat inside. Indoor gatherings involve dropping snacks, vacuuming, spilling drinks – no thanks! With an outdoor fireplace, you can extend those fun afternoons into the evening when the temperatures drop!
Outdoor fireplaces come in a variety of sizes and designs, but also in a variety of budgets! If you have the time and/or money to design your outdoor space, you can create something truly spectacular or you can use Kathmandu discount code that will save your time as well as your money. The good news is that you can build a stone fireplace yourself for very little cost, especially if you have recycled materials! Start planning and ask your friends and family if they have any materials left over from their last DIY project – you’ll be surprised how much you can get without spending a dime!
Safety considerations when building an outdoor fireplace:
Before you begin the steps of building an outdoor fireplace, there are a few safety considerations you should keep in mind:
Check local safety codes. Depending on where you live, you may need a building permit for new construction (and in some cases, this applies to fireplaces too!). Also, find out what environmental laws in your area apply to backyard fireplaces. It would be a shame to go to the trouble of building a fireplace only to find out that it’s not legal and you can’t use it!
Location is very important. Look up! Make sure your fire pit is not near branches, power lines, or other structures like awnings. Again, it’s worth checking with local authorities, but as a general rule, your fireplace should be at least 20 feet away from any flammable structure.
Secure your fireplace with a thick steel ring or firebrick ring. These will protect the blocks from heat, which can cause them to dry out and break prematurely.
A fireplace should be built as low to the ground as possible, with the walls rising no more than one meter from the ground. To ensure stability, the base of the wall should be buried in a hole lined with gravel for drainage. A concrete base can then be poured over it, similar to the foundation of a garden shed or other small structure.
This is not so much a safety issue as a consideration….. A kind of blanket for your home! After a week around the fire, you’ll be grateful I mentioned it!
What do you need to have for building an outdoor fireplace?
For your foundation, you will need
- a shovel
- Gravel/blue metal or something similar
- Old wood to create a form frame
Enough cement mix to create a solid foundation (depending on the size of your fireplace).
· On the 2nd day, or when the cement has hardened, you will need:
- Mortar
- Mortar trowel
- Stones, bricks or pavers of your choice.
- A good playlist for your ears to get you in the mood for your next outdoor gathering!
Can any stone be used for a fireplace?
When choosing stones for your fire pit, you should keep in mind that they will heat up a lot. Very dense stones like granite and marble have trouble absorbing moisture and can explode from the heat. The safest types of rock to build a fireplace with are sandstone, lava rock, firebrick, recycled pavers and concrete.
Here’s how to build an outdoor stone fireplace:
Fireplace Foundations:
Once you’ve chosen the location for your fireplace, it’s time to build the foundation. Mark the spot where you want to build your fireplace and dig a square the desired width of the fireplace and about 200 mm deep. Place a bed of gravel in the hole to ensure drainage. Make your own formwork frame from scrap wood, such as old floorboards. This frame must fit the hole you have dug, as it will hold the concrete in place until it hardens when you pour it.
Pour the concrete:
Use a wheelbarrow to pour the cement into the formwork. Ideally, lay out a piece of rebar halfway up and pour the concrete over it until you reach the top of the area to be dug. (If you don’t have any, ask for a piece of rebar – someone you know should have some lying around.)
Build your chimney:
You really need to take your time for the first layer of bricks/blocks. This layer should be perfectly level, and if you do this step right, the rest will be much easier! I suggest making the mortar mix a little wetter than usual if you are using materials like firebricks, as they tend to absorb moisture, which can cause the mortar to dry out quickly and cause cracks. The mortar acts as a glue to hold the bricks together, but it also helps you level the layers by providing a cushion and a bit of clearance.
The rest of the technique depends on the type of stone or brick you use. Of course, square or rectangular shapes are fairly easy to lay around your wall, but be careful: mistakes you make with bricks of the same size will be much more noticeable than with bricks of different sizes! If you’re using stones of different shapes and sizes, try alternating larger and smaller stones to create a pleasing aesthetic.
Once you have created this first course, I recommend lining the inside of the wall with a row of firebricks (also attached with mortar). The firebricks will act as a fire retardant on the inside of the wall and help your chimney last longer. Continue layering the wall and firebricks until you reach the desired height.
I like to use a black oven spray to paint the firebrick because it makes it stand out much less (instead of white).
Cover the top of your chimney:
This step isn’t absolutely necessary, but it gives the chimney a nice finish. Consider a finishing stone/brick layer that slightly overlaps the inside and/or outside of your wall. To do this, you can lay the pavers or bricks on a different side than where they were used in the wall, or turn the bricks in a different direction. Allowing the top layer to slightly overlap the inside of the wall can also provide additional wind protection!
Experiment.
Now comes the fun part!
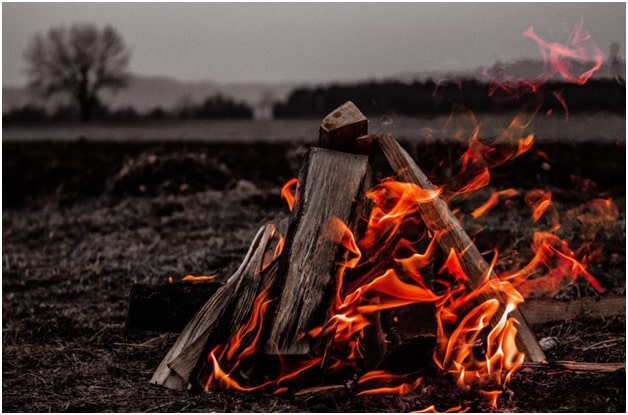
As with any campfire, wind is your enemy, so pick a good day to christen your new fire pit! Depending on the size of the fire pit, you can now experiment with all sorts of cooking methods and equipment on the campfire. For example, hang a Dutch oven on a tripod over your fire pit, or place a cast iron slab on the wall to create an instant cooking area. Oh, and make sure the fridge is stocked with beer, because your friends will be staying much longer now!
Author Bio:
David Burnhamis a content specialist who loves to review the products and brands to bring the best experience to the consumers. Stay connected with me at Revounts to get legit deals including the Kathmandu discount code and more.